CodeBreaker2018 walkthrough, Task 5 Containment
— 11 min read

In this task we are asked to find out which hosts were infected on our network given the victim IDs we have discovered in Task 4.
What do we know so far:
- We have a list of all VictimIDs
- We can the generate the correct VictimIDs the given IP address and OTP
- We know the IP range for our network is 10.47.0.0/16 (2^16)
- We know that OTPs are 6 digit numbers (roughly 2^20)
Given the above we are looking at the problem space with the size of 2^16 * 2^20. This is roughly 10^10 tries. In these days of cloud computing, multi-core CPUs seems pretty feasible to brute force. Looks like 100 something cores cluster will be able to to crack this in a few minutes.
Configure CI server
These days when faced with this type of tasks, I use continuous integration (CI) servers. My favorite one is Go.CD. Unfortunately, the particular feature that we'll need to solve this task cheaply and efficiently is only available in the enterprise version. So, we will go with Jenkins.
To solve this task I have launched a brand new Jenkins server using standard configuration. After initial setup, we need to install the following plugins:
- Amazon EC2
- GitHub API
- Job DSL
- Chucknorris
- Github
- Matrix Project
- Matrix Reloaded
- Timestamper
The only Jenkins job that we will create by hand is the seed job, which will bring up the rest of the jobs.
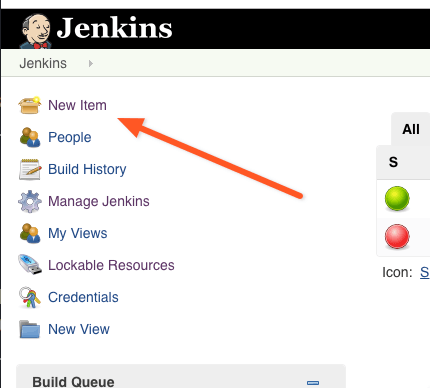
To create the seed job first click the 'New Item' link on the main page of Jenkins.
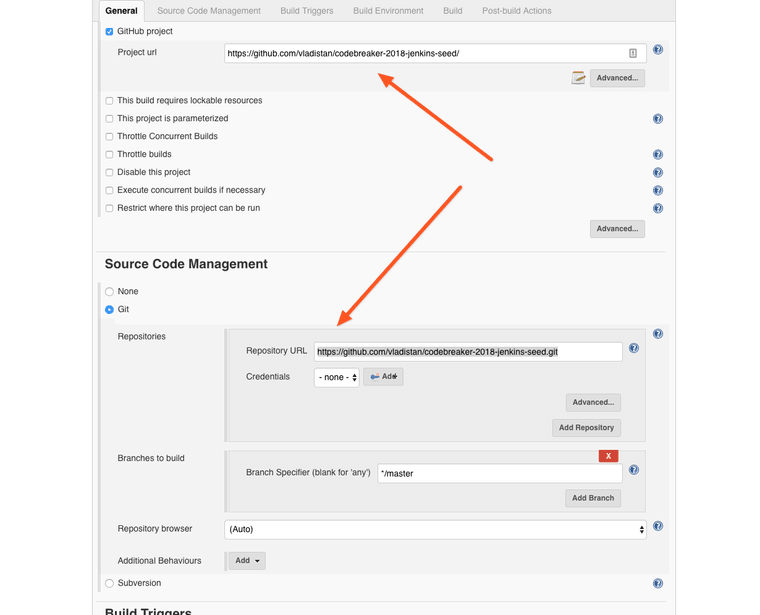
Then select Freestyle Project as the project type. On the configuration screen select the checkbox Github Project and enter https://github.com/vladistan/codebreaker-2018-jenkins-seed/ for Github Project URL. Also, enter https://github.com/vladistan/codebreaker-2018-jenkins-seed.git as git repository URL. Make sure to pay attention to both URLs they look the same, but the last one ends with .git
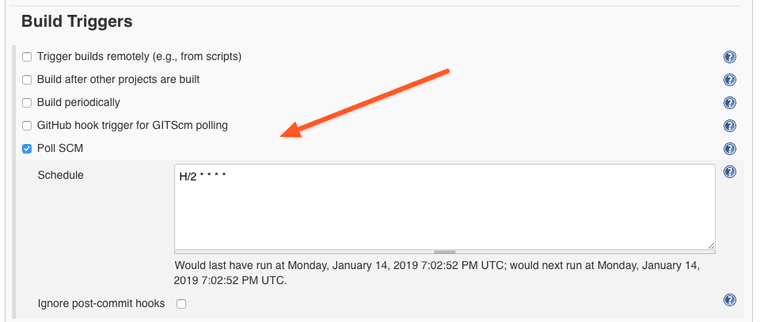
In the build triggers configure it to Poll SCM and enter H/2 * * * * as the schedule. With this schedule string the Jenkins server will poll the GitHub seed-job repository every two minutes, and when it detects the changes it will apply them to existing jobs right away.
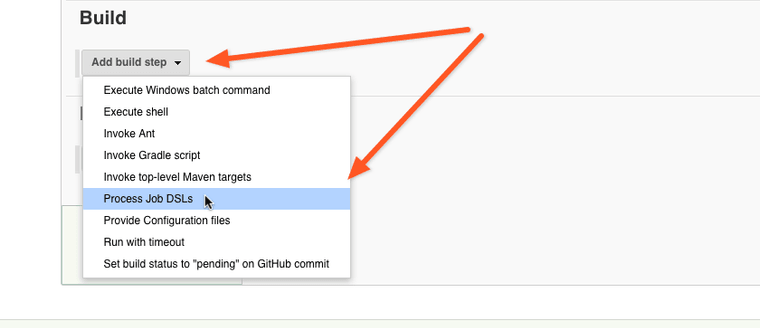
Scroll down to the Build section and click on the Add Build Step button. When pop-up appears, select Process Job DSLs
Configure DSL build step to look for the job definitions on the file system, and enter **/*.groovy as the DSL script filename pattern.
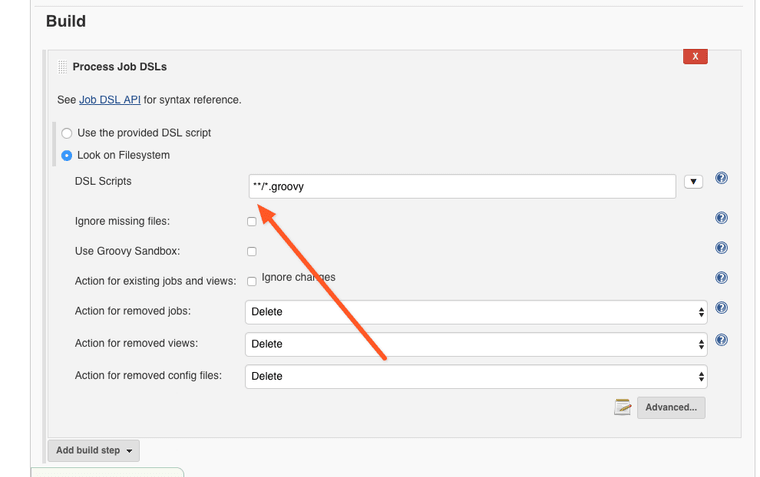
Finally save the job. Once you do it the Jenkins server will start polling GitHub and create jobs defined in the scripts placed in the repository.
After a few minutes, you should a see a new job called vlad-task-5 appearing on the Jenkins main screen. Running this job will give you solution to the Task-5, but for my personal set of input. Let's examine this job in details and see how to customize it for different sets of inputs.
Brute force ID cracking job
We will use the following method to find the IP addresses by brute force
-
We will add a few routines to the model that will use the CID routine to generate series of CIDs for the given range of IP addresses and OTP values. Also, we will add functions to see if these newly generated CIDs match any of the known CIDs. Finally, we will add functions that generate individual IP addresses and OTP values given the range.
-
We will create a cracking program that given the IP subrange will try all possible addresses and OTP values in that subrange to see if any CIDs that are generated using these match CIDs known by us.
-
We will put this program into a Docker container
-
We will use the Jenkins server to the container against every possible subrange within the range of IP addresses given to us. We will use Matrix Project plugin for that.
-
Jenkins server will create a number of temporary EC2 instances necessary to run the cracking program. Jenkins will take care of spinning up the instances when there are jobs to run and will shut them down when they are no longer needed. For that we will use Amazon EC2 plugin.
-
That cracking program will be set up in such a way that it will indicate a failure when it finds matching CID. If it doesn't find any matching CIDs in the given range it will finish successfully. Doing it this way makes it easier to spot the runs we are interested in.
Here is the modified model with all functions, tests, and an instance of cracking program
Since cracking program takes some time to run and go over all possible OTP values and networking addresses we need to divide our search space into smaller manageable chunks. From network_information.txt we see that we need to cover /16 size network. Which means that first two octets of the IP address always remain the same and two others vary between 0 to 255. We will break down our runs to probe a single value of 3rd octet and 16 possible values in the 4th octet. This way we'll need to have about 4000 runs of our program or more precisely 16 * 256
Let's test it using the IP address that we already know, being the one we found in Task 0 10.47.114.22. This address can be found in the search segment 114 1. First number is just a third octet of IP address (114) and second number is the second 16 address region of the fourth address. First region is 0-15, second is 16-31, etc.
Let's give it a spin.
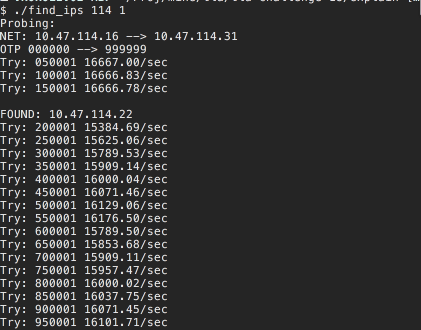
Great, we have found the IP address.
As mentioned above, the Jenkins server will be launching EC2 instances that run standard distribution of Amazon Linux without anything preinstalled. The cracking program cannot run on such instances as is, because they miss necessary pre-requisites such as CPPUtest and OpenSSL libraries. Instead of messing with configuration of these ephemeral instances to install all prerequisites and dealing with potential version conflicts, we will run our cracking program using Docker.
Docker lets us bundle everything that is needed to run the program into container. This container can be downloaded and run on any type of machine without installing anything except for the Docker engine.
Here is the Dockerfile that we will use to build our container. To build the container run the following command
docker build .
You should see something like this
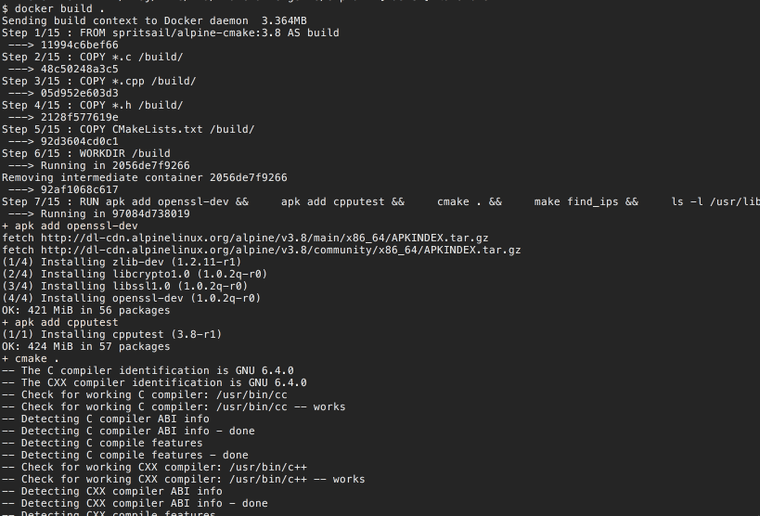
We'll use a two stage docker file. In the first stage we'll download all the prerequisites necessary to build the cracking program. In the second stage we'll copy the built cracking program and it's runtime dependencies to a much smaller barebones container. This approach keeps the container sizes smaller. You need to keep your containers small to avoid long download and setting up times. This is especially true for the cloud environments like AWS where we are billed for every minute of running time.
Once build is complete, you will see something like this.
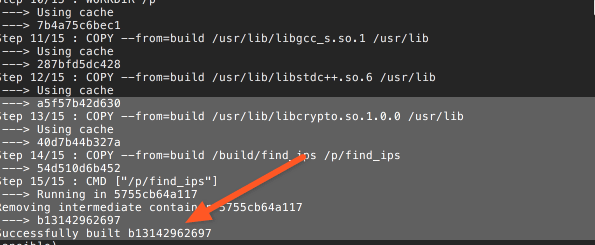
Pay attention to the last line, indicated by an arrow. The hex number there is the image ID, which you'll need to run our image.
Detour. Creating dockerhub repository
To run the docker container of our cracking program EC2 instances created by Jenkins need to download it from somewhere. The easiest place to host public docker containers is Dockerhub
Follow the link above and sign up for the free account if you don't already have one. Once you logged in to dockerhub with your account, create a new repository by clicking Create repository button.

Enter repository name and make sure it has public access.
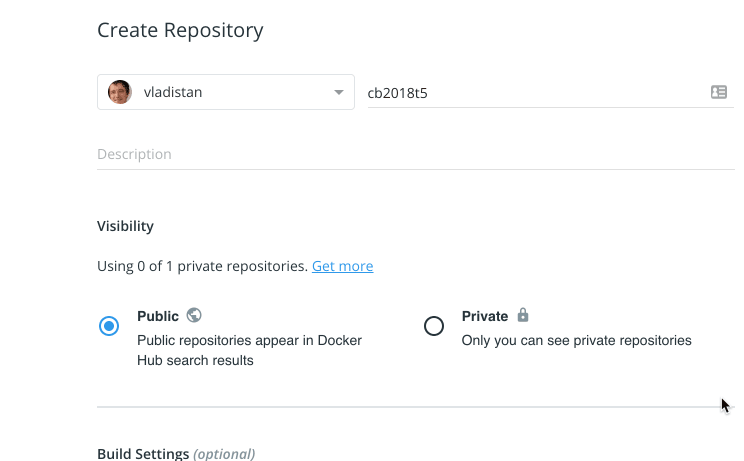
Continue solving the problems
Login to docker from your terminal using the following command
docker login

Tag the image we just built for uploading using the following command
docker tag IMAGE_ID DOCKER_ACCOUNT/REPO_NAME:VERSION
Substitute the IMAGE_ID with the ID you got at the end of the built, use your docker account name for DOCKER_ACCOUNT. For REPO_NAME use the name of the created repository. For version number use any number, if you ever need to upload a new version of the container make sure to increment this number.
For example, my command looks like this:
docker tag b13142962697 vladistan/cb2018t5:0.1
Once you have tagged your image use the following command to push the container image to the docker hub.
docker push DOCKER_ACCOUNT/REPO_NAME:VERSION
the output should look like this:

Now, that we pushed the image, let's look at it on the Dockerhub.
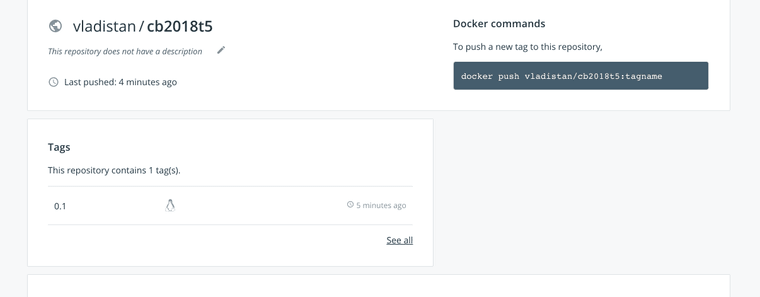
Yes, it's there
Now let's repeat the test run using Docker
docker run vladistan/cb2018t5:0.1 /p/find_ips 114 1
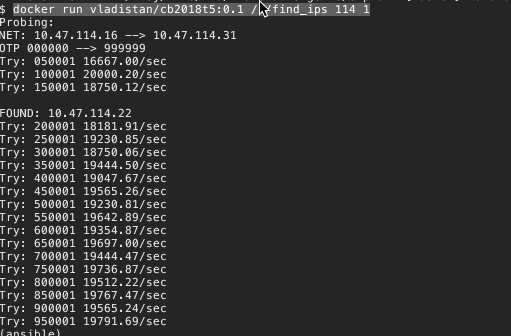
Looks good.
Now, let's have a massive run. Here is our test Jenkins job definition. And this is how it looks in Jenkins.
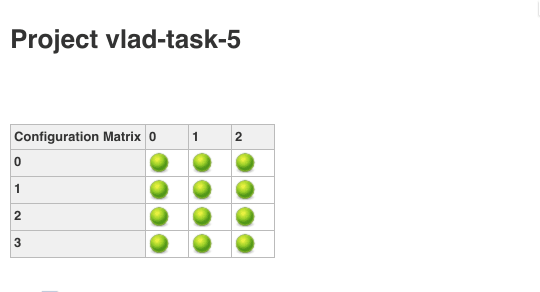
Each green bubble represents a single run of the job. Clicking on a bubble will take you to the details of the particular run represented by that bubble.
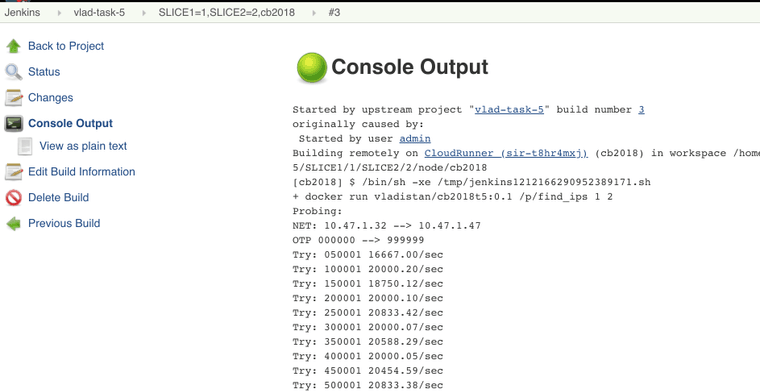
Now that we see everything is working we'll need to bump things up a little bit. Cloud providers like AWS charge per compute hour. This means that it will cost us the same amount of money to run 100 cores for one hour, or one core for 100 hours. But it will take 100 times longer to do the later. What we need is a few really big machines.
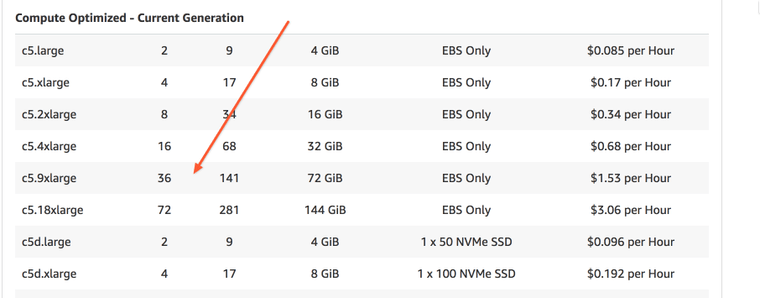
36 cores looks like a nice option for the task.
Also, we don't want to pay the full price if it's possible. Let's check the spot market.
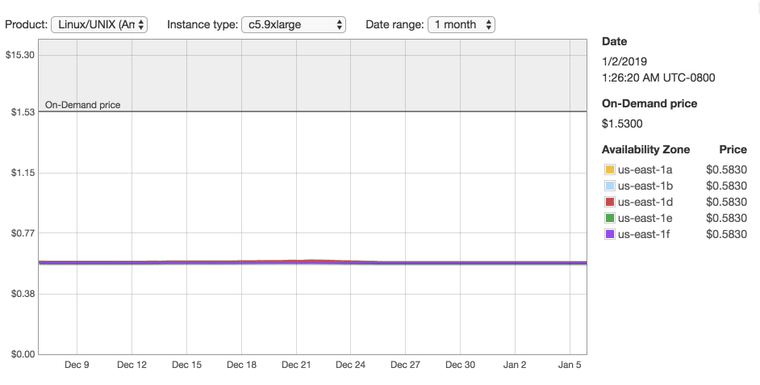
Looks like the real price for that machine is $0.58/hr which is better than the full price of $1.53/hr.
So, let's enter these parameters machine_type and spot_price into the Jenkins Ec2 plugin configuration. We'll bid $0.63 cents so that we don't get shutdown during the run. A spot price depends on how much and how many people are willing to pay and the number of available machines is limited. There is always a chance that someone will come in a middle of our run and will offer a higher price for the machine. When this happens our machine will get shut down and be given to the highest bidder.
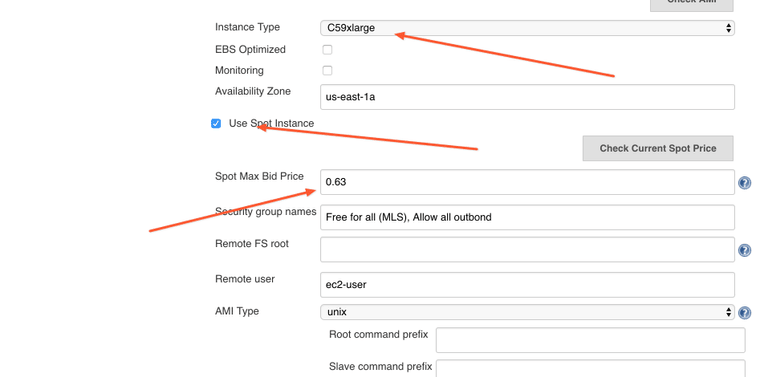
We have a 36 core machine, which means we can run 36 independent containers at the same time. Our jobs are CPU bound, each container will always take 100% of the CPU core during the run. But we shouldn't use entire the CPU, we need to leave some capacity to Jenkins and Docker so that they can orchestrate the runs, collect the logs and shuffle them to the master node, etc. Let's allocate 32 out of 36 cores to our jobs and leave 4 cores to Jenkins and Docker.
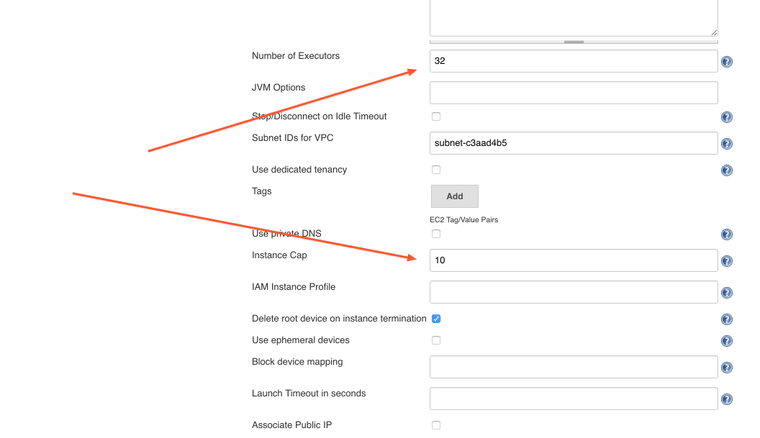
Bill Gates said 640 is enough for everybody. We'll settle for half of it.
Now let's change the job to run over the entire space.

This is how it looks like in Jenkins
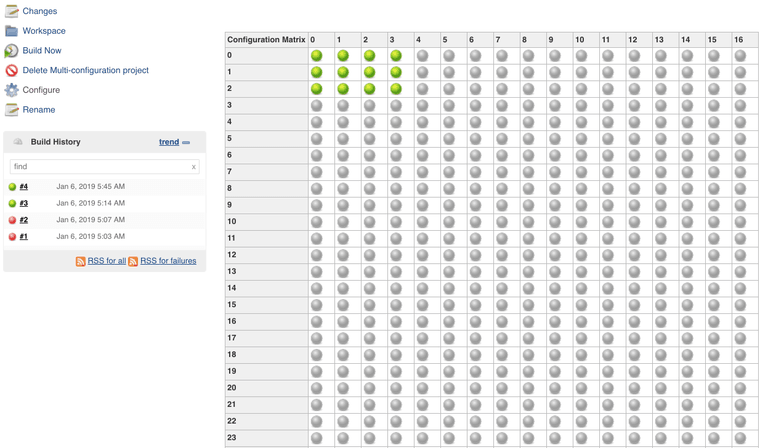
Now we press the run button, and we got close to 3000 jobs on the queue.

Jenkins spun up 7 instances and started to run the jobs. We got 224 cores chugging. (7*32)
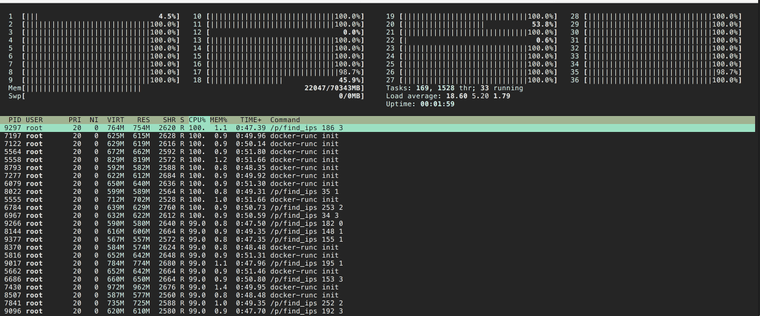
After 14 minutes the jobs are done, and we see that some of them have failed.
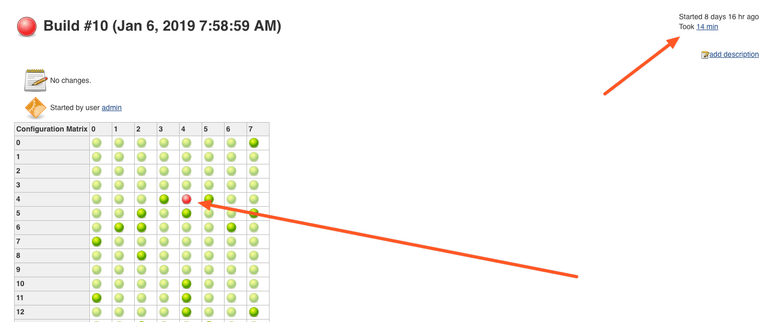
Let's click on the red balls to see why they have failed.
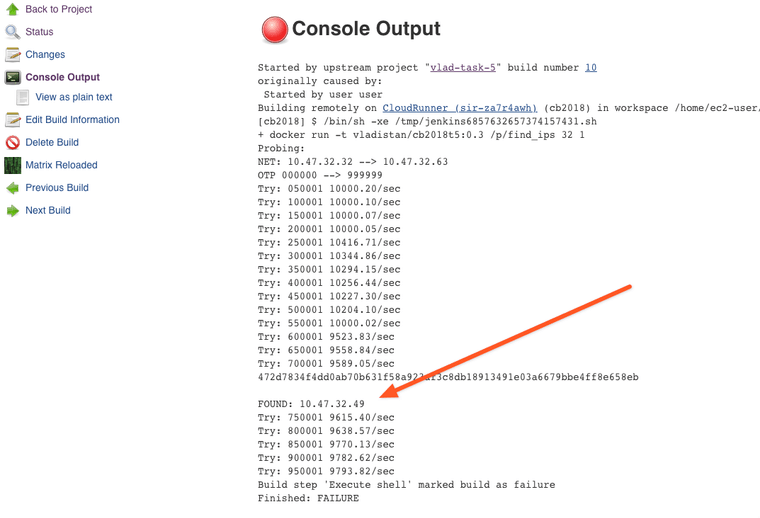
Great, we have found the victim IP address. Let's look at the other jobs and collect the client IDs and IP addresses.
ea1e03022cc3a0378ef9056b5346befdf735f56d56509dcb3d1ea03191803815FOUND: 10.47.4.142472d7834f4dd0ab70b631f58a923af3c8db18913491e03a6679bbe4ff8e658ebFOUND: 10.47.32.49b784c8325a15d7b7d62d4ded79b86b08fd0cbc8ed0099fee200b55ef8791eae6FOUND: 10.47.114.22And then let's submit those to the challenge.
We have brute-forced the whole thing under 20 minutes of running time, using 10 machines paying $0.63/hr for each one. The total cost to solve this problem is about $2.00. Not bad at all.
Note, my actual costs were a bit higher. I am still learning how to write programs that run correctly first time I run them. Because of this it took more than one attempt to solve the problem. My actual costs were about $10.00.

Additional reading material
-
We used the Jenkins server to help us orchestrate the efforts and organize the results. To read more about it, I suggest to have a look at Jenkins: The Definitive Guide by John Ferguson Smart
-
To configure jobs we have used Jenkins Job DSL language. It's based on Groovy and to read more about Groovy consider this book Programming Groovy 2: Dynamic Productivity for the Java Developer by Venkat Subramaniam
Now on to Task 6 Loophole.
Comments powered by Talkyard.